I've been playing with natural dye and having tons of fun lately.
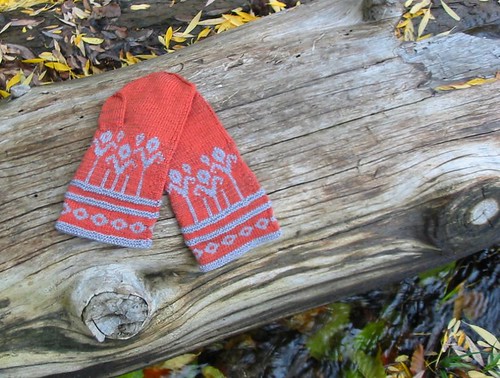
It began during my trip to Istanbul. I had a wonderful chat with a rug dealer at the Grand Bazaar. He was not pushy to sell at all (all we ended up buying were the cheapest things in the shop - few pillow covers, the only thing we could afford.) After the sale, he invited us to sit down for some tea. We talked about so many things, his trips to the U.S. and his favorite place was Montana, and the friendliness and easy attitudes of Americans that most people in other parts of the world don't see. We talked about Orhan Pamuk's books. We talked about Turkish culture, and Grand Bazaar. And we talked about rugs and dyes. He said, "but natural dyes are much better. Sure they fade over time, but the colors are so much more subtle and interesting.... " We talked about cochinal bugs, etc. Ever since then I'd been thinking about natural dyed yarn.
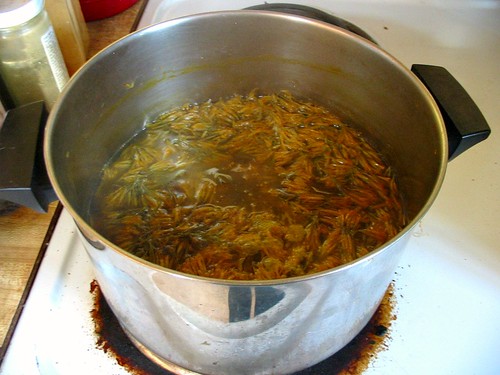
I'd actually never seen knitting yarn with natural dyes before except for the ones I did with turmeric which was soooo not lightfast. I don't mind color fading over time and that is what natural dye does, but when color fades noticeably within 2 or 3 days, it was discouraging. So on my last trip down to Bay Area, I stopped by A Verb for Keeping Warm Berkeley store. It was a little jewel of shop. I was immediately drawn by the color of the natural dye yarn they have in the store. Though I had no money left to buy any yarn there, I thought to myself, I must try dyeing some yarn myself using natural dyes. Few weeks later, I ordered some dye from Botanical Colors and some yarn, and began my dyeing frenzy.
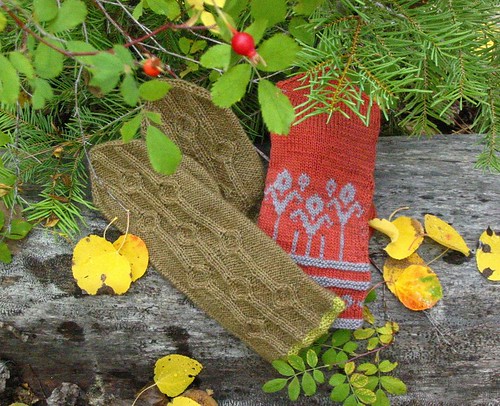
After much playing, I had a big load of yarn. So I decided to at least knit coupla quick projects up to see how they look. I made a pair of mittens for myself and a pair for Paul. I really do love the way the colors came out. I learned big way that different yarn takes dye so differently. Superwash yarn take up way more dye than non-superwash. BF Leicester yarn (like the brown mittens) does not take up nearly as much dye, thus gives a more delicate coloring.

So I wrote down notes for the mittens.
Mittens 1
Yarn: fingering weight.
Color A: orange, dyed with madder, color B: light gray, dyed with logwood gray.
Needles: US #2
Gauge: 33 sts x 38 rows = 4" x 4" over colorwork pattern.
Finished Measurement: ~4 1/4" width x 9" height.
Garter Pattern (total 4 rounds): k 1 round, p 1 round, k 1 round, p 1 round.
With yarn B, CO 70 sts.
Place first marker at the beginning of the round, place second marker after 35 sts to indicate half of the round.
Work Garter Pattern once.
Begin Chart 1 over the first 35 sts, repest for the next 35 sts.
Work Garter Pattern once in yarn B.
Switch to yarn A and k 4 rounds.
Work Garter Pattern once in yarn B.
Begin Chart 2 over the first 35 sts, repeat once for the next 35 sts.
Work all 28 rows of chart 2.
From now on, work only with yarn A.
Next round (decrease round - decrease because gauge difference of single color from colorwork knitting): *ssk, k8, ssk, k11, k2tog, k8, k2tog. Repeat from* (total 62 sts left.)
Next round: k all sts.
Next round (thumb placement over 9 sts):
For right hand – k 10, slip the last 9 sts from right needle back to left needle, use 12” waste yarn and knit the 9 sts again. Resume knitting with yarn A and k rest of the round.
For left hand – k 34 sts, slip the last 9 sts from right needle back to left needle, use 12” waste yarn and knit the 9 sts again. Resume knitting with yarn A and k rest of the round.

(shown left hand mitt) knit 34 sts after second marker.

slip 9 sts from right needle to left needle

k 9 sts with waste yarn
K all rounds until 1 1/2” from finger tips.
Next round: slip first marker, ssk, k to last 2 sts before second marker, k2tog, slip second marker, ssk, k to last 2 sts before end of round, k2tog.
Repeat the decrease every round until only total 6 sts left.
Next round: * ssk, slip the st from right needle back to left needle and pass the next st over it. (2 sts decreased.). Repeat from *
Cut yarn and thread it through the last 2 sts.
Thumb:
(This is easiest with 2 needles to pick up sts. If you use other methods to work in round, it’s easiest to pick up with 2 needles first and then redistribute them as you like over needles.)
With first needle, pick up 1 st on the row to the right side of waste yarn, pick up the 9 sts below the waste yarn, pick up 1 st on the row to the left side of the waste yarn.
With second needle, pick up 1 sts on the row to the left side of waste yarn, pick up the 9 sts above the waste yarn, pick up 1 st on the row to the right side of the waste yarn.
Total 22 sts pick up.
sts.
Join yarn, knit in round until 1/2" from tip of thumb. sts.

pick up 9 sts below waste yarn, and 1 st on either side
pick up 9 sts above waste yarn, and 1 st on either side

pulling out waste yarn

ready to knit in round
Begin shaping for thumb:
Next round: ssk, k to 2 sts before the second marker, k2tog, ssk, k to last 2 sts, k2tog.
Repeat the decrease every round until only total 6 sts left.
Next round: * ssk, slip the st from right needle back to left needle and pass the next st over it. (2 sts decreased.). Repeat from *
Cut yarn and thread it through the last 2 sts.
Weave in ends.
Block.
Chart 1

Chart 2

Mittens 2

Yarn: Sports weight.
Color A - Light Brown - Dyed with Cutch, Madder and modified with iron.
Color B - Yellow - Dyed with Rabbitbrush flowers and modified with iron.
Needles: US #2
Gauge: 30 sts and 40 rows = 4" x 4" (the row count is not as important since you can lengthen or shorten the mittens.)
Finished measurement: 4" width x 11" height
CO 60 sts
place first marker at the beginning of round, and place the second marker after 30 sts.
Use Color B and work Garter rounds for 4 rounds (k 1 round, p 1 round, k 1 round, p 1 round.)

Switch to Color A and work cable chart row 1 for 30 sts, place marker, repeat for the next 30 sts.
Continued the cable chart for the first 30 sts, and work only row 1 for the next 30 sts for the entire mitten.
Work until desired length for thumb placement (about 6" from the CO).
Next round, thumb placement over 10 sts:
For right hand – work to second marker, work 11, slip the last 10 sts from right needle back to left needle, use 12” waste yarn and knit the 10 sts again. Resume knitting with yarn A and finish rest of the round.
For left hand – work to second marker, work 29 st (1 st to the end of round,) slip the last 10 sts from right needle back to left needle, use 12” waste yarn and knit the 10 sts again. Resume knitting with yarn A and finish rest of the round.
Continued in established pattern until about 1 1/2" from fingertips (mine was another 3 3/4" from thumb placement.)
Begin shaping top:
(Now stop repeating cables on the first 30 sts, just work them in row 1 only)
Next round: sm, ssk, work in est patt to 2 sts before second marker, k2tog, ssk, work in est patt to last 2 sts, k2tog.
Repeat the decrease every round until only 4 sts left.
Next round: k2tog twice.
Cut yarn and thread it through the last 2 sts.
Thumb:
(This is easiest with 2 needles to pick up sts. If you use other methods to work in round, it’s easiest to pick up with 2 needles first and then redistribute them as you like over needles.)
With first needle, pick up 1 st on the row to the right side of waste yarn, pick up the 10 sts below the waste yarn, pick up 1 st on the row to the left side of the waste yarn.
With second needle, pick up 1 sts on the row to the left side of waste yarn, pick up the 10 sts above the waste yarn, pick up 1 st on the row to the right side of the waste yarn.
Total 24 sts pick up.
work in round in est patt (or just purl all sts) until 1/2" from tip of thumb.
Begin shaping:
Next round: sm, ssk, work to 2 sts before next marker, k2tog, ssk, work to last 2 sts, k2tog.
Repeat the decrease every round until only 4 sts left.
Next round: k2tog twice.
Cut yarn and thread it through the last 2 sts.
Weave in ends.
Block.


